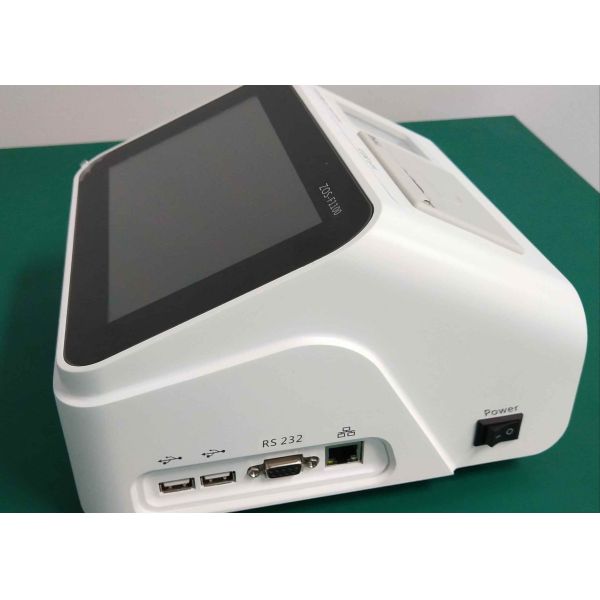
CPU: | i MX6 |
Resolution ratio | Support resolution below 1080p |
Hard disk space | 8GB |
Memory | 1GB |
Network conditions | Network port |
Network operation environment | LAN network |
Printing system | Built in thermal printer |
Data processing | Support LIS connection transfer test results and data import |
Excitation light source | LED |
Sample type | Whole blood, serum, plasma and urine |
Sample management | Automatically identify test items. Timely output and transmission of test results |
Power parameters | Host input——DC 12V,5A;Adapter input——AC 220V,50Hz |
Input power | 60VA |
weight | About 3kg |
1. Click "scan QR code" and align the QR code card with the QR code scanner (about 10cm) to read the project information.
matters needing attention:
(1) For different projects, QR code card can not cross scan.
(2) The same article, different batches, two-dimensional code card can not cross scan.
2.Input the information of the subjects, select the sample type and reaction mode
matters needing attention:
A) Out of machine mode: it means to put the reagent card of the sample to be tested in the external thermal insulation after adding the sample, and put the reagent card into the instrument to analyze the sample results after the thermal insulation is completed.
B) In machine mode: the reagent card of the sample to be tested is directly put into the instrument for incubation after adding the sample, and the instrument will automatically analyze the sample results after incubation.
3. Add sample: suck out sample, add buffer and mix well. Add the mixed sample into the reagent card according to the reagent instructions with the sample adding gun.
4. Test: put the barcode end of the reagent card into the reagent card, and click "start test", the instrument will automatically identify the test items and conduct countdown test.
matters needing attention:
1) Make sure the reagent card is in place. When inserting the reagent card, there is resistance and mechanical sound, indicating that the reagent card is placed in place.
(2) After the reagent card is put into the instrument, it cannot be removed by force. To remove the reagent card, click "exit card" to remove it.
Product features
Enrich peripheral interfaces | Can connect LIS /HISand external printer, etc |
Smart Android system | Better user experience |
Automatic printing of results | Built in thermal printer for automatic printing of results |
Scan code automatic entry | QR code entry of calibration information is convenient and quick |
7 inch capacitive touch screen | More sensitive control, more convenient operation |
Automatic project identification | Support internal and external test mode |