Inflatable Large Waves Water Slide With Long Pool Blue Color
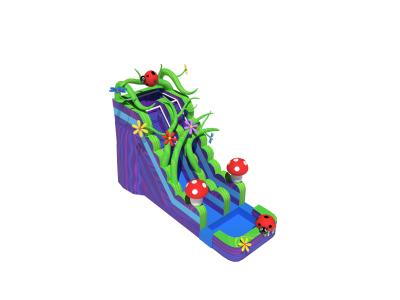
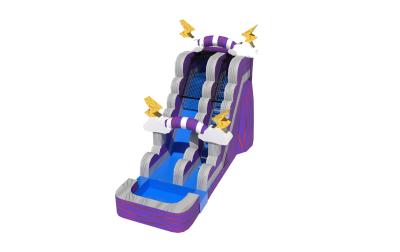
This picture showcases a creative and fun water slide structure, with blue and gray as the main colors, presenting a fresh and eye-catching visual effect. The main part of the slide is composed of several wave-shaped modules arranged in different angles and positions to form a smooth and challenging sliding path. Each module is decorated with patterns resembling waves, enhancing the atmosphere of a water park.
Atop the slide is a hill-like structure covered with white snowflake designs, giving a sense of coldness mixed with excitement. This might be intended to simulate an icy environment, adding to the thrill of visitors' experience. On one side of the hill, there's a staircase leading up to the entrance of the slide for easy access.
The background is plain white, making the blue slide stand out even more. Such simple design directs people's attention to the slide itself while also leaving ample space for potential scene setups or themed events.
This water slide not only looks attractive but also appears to offer safe and enjoyable play experiences for visitors of various ages. It could likely be set in an indoor or outdoor water park, becoming a highlight attraction there.
Specifications:
Material |
0.55mm PVC Tarpaulin |
Size |
20x4.5x7m or Customize |
Color |
As the picture shown or customized |
Printing |
Drawing printing |
Package |
Strong PVC bag for inflatables, carton for blower |
Accessories |
Blower, repair kit (spare material and glue) |
Blower |
CE:220-240V UL: 110-115V |
OEM |
available |
Workmanship |
Double Stitching |
Certificates |
CE, SGS, EN14960 |
Set uptime |
About 10 mins, depend on the Amusement park size |
MOQ |
1 Piece |
Payment |
T/T, 30% deposit and 70% balance when shipment |
Shipment |
By sea, by air or by express |
Warranty |
24 months |
Application |
Outdoor and indoor amusement for kids and adults |
Advantageds:
1.Exceptional Safety, Premier Quality, Outstanding Performance
2.Constructed to endure commercial usage such as rentals
3.Robust heavy-duty material
4.Robustness, Durability, Long-term Viability
5.One of the most extensive, comprehensive, and longest warranties in the industry
6.The highest-grade, heavy-duty, fire-retardant, PVC-coated vinyl throughout the entire unit
7.At least double and triple stitched, reinforced seams
8.Innovative, cutting-edge design and technology
9.Thoughtfully engineered with additional safety features
10.Consistent construction combined with friendly, reliable, and superior customer service.
Buying Guides
1.Please select the items you require, indicate the order quantity, and mention any specific requirements you may have.
2.We will offer you the best price along with detailed information.
3.Once you confirm the order, we will prepare a Proforma Invoice including the order and payment details.
4.We will commence production upon receiving a 30% deposit.
5.We will conduct a quality inspection and take photos for your confirmation to see if any modifications are necessary.
6.We will arrange for the shipment and release it, and send you the shipping documents upon receiving the remaining payment.
FAQ
Q: How to repair when damage?
A:
Step 1: Identify the Damage
Thoroughly inspect the inflatable to locate any tears, punctures, or leaks.
Step 2: Clean and Dry the Area
Clean the damaged area with mild soap and water to remove dirt or debris. Allow the area to dry completely before proceeding with the repair.
Step 3: Patch the Damage
Apply a patch specifically designed for inflatable repairs over the damaged area. Make sure the patch is slightly larger than the damaged area to ensure proper coverage. Press the patch firmly onto the surface, smoothing out any wrinkles or air bubbles.
Step 4: Apply Adhesive
If using a patch that requires adhesive, apply a thin, even layer of adhesive to both the patch and the inflatable surface. Allow the adhesive to become tacky before pressing the patch onto the surface.
Step 5: Allow Time to Cure/Allow the Adhesive to Dry
Once the patch is in place, you'll need to allow the adhesive to dry completely. This may take several hours, depending on the type of adhesive you are using. It's important to avoid using the inflatable until the adhesive is completely dry, as this could cause the patch to come loose. Wait at least 1 hour before inflating again.
Step 6: Test the Repair
Once the patch has cured, inflate the inflatable and check for any signs of leakage. If the repair holds, the inflatable is ready to be used again.
It's important to use repair materials specifically designed for inflatables and follow the manufacturer's instructions carefully to ensure a successful repair. If the damage is extensive or beyond your ability to repair, consider seeking professional assistance.
-
Q: Accessories included?
A: Free accessories include Storage Bag / Repair Kit / Warning Label / Custom Logo .