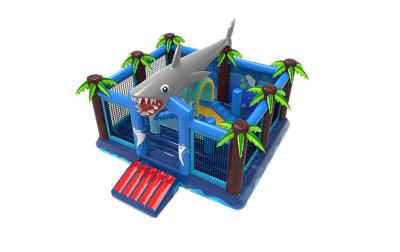
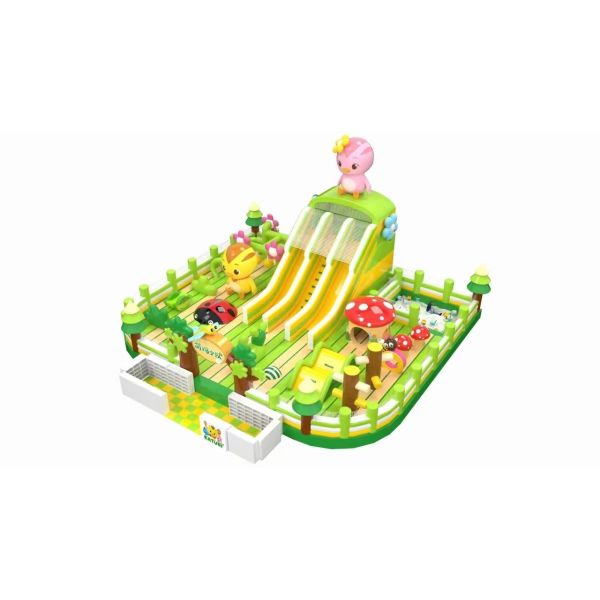
Inflatable Play Castle
In this picture, we can see that the inflatable playground is located in a spacious indoor venue, possibly an indoor play area within a large shopping mall or an event center. Here is a more detailed description:
1. The playground's floor is covered with soft, non-slip mats to ensure the safety of the children while they play.
2. The large orange slide is the focal point of the playground, with a design featuring curved chutes for a thrilling experience as children slide down. There is a transparent observation window at the top of the slide, allowing parents to monitor their child's safety from the outside.
3. The pink slide is relatively smaller and is suitable for younger children, with a gentler design to ensure safety.
4. The yellow climbing area includes multiple climbing blocks of various shapes, providing an opportunity for children to exercise their coordination and strength.
5. Next to the huge orange carrot-shaped inflatable toy, there are other cartoon characters such as bears and bunnies, which are beloved by children.
6. There may be fences or safety nets around the playground to prevent children from falling off the play equipment.
7. At the entrance of the playground, there is likely a safety check point where staff members check the height and weight of the children to ensure they are suitable for using the facilities.
8. The background of the scene is blurry, but it can be seen that there are parents watching their children play, some taking photos, and others chatting.
9. The color tone of the picture is bright and vibrant, creating an atmosphere of joy and liveliness, which is perfect for children's birthday parties or family entertainment activities.
Specifications:
Material | PVC Tarpaulin |
Size |
Customize |
Color | As the picture shown or customized |
Printing | Drawing printing |
Package | Strong PVC bag for inflatables, carton for blower |
Accessories | Blower, repair kit (spare material and glue) |
Blower | CE:220-240V UL: 110-115V |
OEM | available |
Workmanship | Double Stitching |
Certificates | CE, SGS, EN14960 |
Set uptime | About 10 mins, depend on the Amusement park size |
MOQ | 1 Piece |
Payment | T/T, 30% deposit and 70% balance when shipment |
Shipment | By sea, by air or by express |
Warranty | 2 years |
Application | Outdoor and indoor amusement for kids and adults |
Sale:
Customers are the most essential element in creating benefits for the company. Consequently, Kule has developed an integrated service policy to meet customers' demands with high - quality products and perfect sales assistance.
1.Before - sale Service: We are online 24 - hours a day to chat with customers. We will provide them with real pictures, factory videos, and offer design and customization services for inflatable water slides.
2.During - sale Service: We examine the production technology and line for customers every day and send pictures and videos of the production steps to customers.
3.After - sale Service: We offer repair kits to customers upon delivery. If customers install it by themselves, we will provide installation videos and guidance.
4.Professional ODM & OEM Service: As a professional provider of inflatable products with many professional and experienced designers in our team, we have been offering our customers the best ODM & OEM services from start to finish.
5.Efficient Shipping Service: As an experienced exporter for many years, we provide the fastest and most cost - effective shipping service to our customers to save time and money for them.
FAQ
Q: How to repair when damage?
A:
Step 1: Identify the Damage
Thoroughly inspect the inflatable to locate any tears, punctures, or leaks.
Step 2: Clean and Dry the Area
Clean the damaged area with mild soap and water to remove dirt or debris. Allow the area to dry completely before proceeding with the repair.
Step 3: Patch the Damage
Apply a patch specifically designed for inflatable repairs over the damaged area. Make sure the patch is slightly larger than the damaged area to ensure proper coverage. Press the patch firmly onto the surface, smoothing out any wrinkles or air bubbles.
Step 4: Apply Adhesive
If using a patch that requires adhesive, apply a thin, even layer of adhesive to both the patch and the inflatable surface. Allow the adhesive to become tacky before pressing the patch onto the surface.
Step 5: Allow Time to Cure/Allow the Adhesive to Dry
Once the patch is in place, you'll need to allow the adhesive to dry completely. This may take several hours, depending on the type of adhesive you are using. It's important to avoid using the inflatable until the adhesive is completely dry, as this could cause the patch to come loose. Wait at least 1 hour before inflating again.
Step 6: Test the Repair
Once the patch has cured, inflate the inflatable and check for any signs of leakage. If the repair holds, the inflatable is ready to be used again.
It's important to use repair materials specifically designed for inflatables and follow the manufacturer's instructions carefully to ensure a successful repair. If the damage is extensive or beyond your ability to repair, consider seeking professional assistance.
-
Q: Accessories included?
A: Free accessories include Storage Bag / Repair Kit / Warning Label / Custom Logo