Inflatable Slides
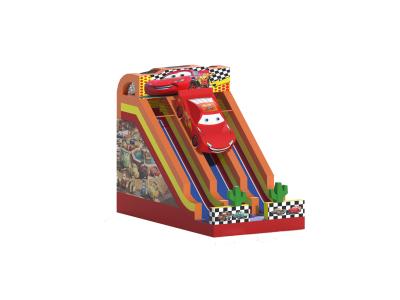
The picture shows a colorful inflatable slide. The main colors of the slide are blue, green, yellow, and pink. The top of the slide is decorated with green palm trees, giving it a tropical feel. There are two brown pillars on both sides of the slide, with pink decorations above the pillars. At the bottom of the slide, there is a blue area that looks like a small pool, and next to it is a red decoration. The entire inflatable slide looks very suitable for children's play, full of joy and fun.
Specifications:
Material | PVC Tarpaulin |
Size | 8*5*6m or Customize |
Color | As the picture shown or customized |
Printing | Drawing printing |
Package | Strong PVC bag for inflatables, carton for blower |
Accessories | Blower, repair kit (spare material and glue) |
Blower | CE:220-240V UL: 110-115V |
OEM | available |
Workmanship | Double Stitching |
Certificates | CE, SGS, EN14960 |
Set uptime | About 10 mins, depend on the Amusement park size |
MOQ | 1 PC |
Payment | T/T, 30% deposit and 70% balance when shipment |
Shipment | By sea, by air or by express |
Warranty | 24 months |
Application | Outdoor and indoor amusement for kids and adults |
A wide array of interesting playstyles awaits on inflatable slides.
Conventional Slide Fun
One-Person Speedy Slide: Children and adults alike can perch themselves at the top of the slide, either with arms crossed over the chest or a firm grip on the handrails. Then, by exploiting the slope-induced potential energy, they speedily slide down to the base. This mode of play provides an exhilarating experience, particularly for those kids who love to take risks and constantly seek to accelerate, feeling the wind's caress as they descend.
Sequential Multi-Player Slide: A group of children can queue up and take turns sliding down. This practice not only enriches the playtime but also inculcates the habit of orderly waiting. In outdoor kindergarten activities or children's play areas, kids can chat and share their sliding sensations while in line, enhancing their social bonds.
Hybrid Play Combinations
Slide-Pool Fusion: If the end of an inflatable slide connects to an inflatable pool, sliders are greeted with a refreshing splash after their journey down. This is a popular choice in summer, allowing people to execute various diving maneuvers like a perfect straight dive or a tucked-up entry, adding to the play's creativity and excitement. The force of hitting the water gives a unique thrill compared to typical pool dives.
Slide-Castle Conjunction: When a slide leads into an inflatable castle, players can step right into a world of adventure after sliding. Inside the castle, they can weave through inflatable hurdles, ascend small inflatable mountains, and worm through tunnels. It's as if they've entered a fairytale adventure realm, where kids can play the part of fearless adventurers and explore uncharted territories.
Inventive Play Approaches
Reverse Ascent on the Slide: For more physically capable older children and adults, climbing up the slide from the bottom is a viable option. By leveraging the slide's surface friction and their own musculature, using hands and feet in unison, they can take on this unorthodox challenge. It's a good exercise for building strength and coordination, but safety should always be a top priority to avoid slips and falls.
Slide Relay Competition: Segment the participants into teams. Each team member slides down in order, and once at the bottom, they sprint to the back of the line to signal the next teammate. This relay not only kindles teamwork spirit and competitive fervor but also makes the slide experience even more enjoyable. You can customize the rules according to different events, such as prescribing the sliding posture or introducing novelty props.
FAQ
Q: How to repair when damage?
A:
Step 1: Identify the Damage
Thoroughly inspect the inflatable to locate any tears, punctures, or leaks.
Step 2: Clean and Dry the Area
Clean the damaged area with mild soap and water to remove dirt or debris. Allow the area to dry completely before proceeding with the repair.
Step 3: Patch the Damage
Apply a patch specifically designed for inflatable repairs over the damaged area. Make sure the patch is slightly larger than the damaged area to ensure proper coverage. Press the patch firmly onto the surface, smoothing out any wrinkles or air bubbles.
Step 4: Apply Adhesive
If using a patch that requires adhesive, apply a thin, even layer of adhesive to both the patch and the inflatable surface. Allow the adhesive to become tacky before pressing the patch onto the surface.
Step 5: Allow Time to Cure/Allow the Adhesive to Dry
Once the patch is in place, you'll need to allow the adhesive to dry completely. This may take several hours, depending on the type of adhesive you are using. It's important to avoid using the inflatable until the adhesive is completely dry, as this could cause the patch to come loose. Wait at least 1 hour before inflating again.
Step 6: Test the Repair
Once the patch has cured, inflate the inflatable and check for any signs of leakage. If the repair holds, the inflatable is ready to be used again.
It's important to use repair materials specifically designed for inflatables and follow the manufacturer's instructions carefully to ensure a successful repair. If the damage is extensive or beyond your ability to repair, consider seeking professional assistance.
-
Q: Accessories included?
A: Free accessories include Storage Bag / Repair Kit / Warning Label / Custom Logo .