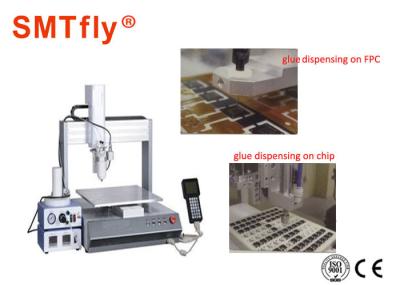
Adhesive Dispensing Equipment SMT Glue Dispenser Machine,SMTfly-300M Description:
The 300MM Stepper is our most popular industrial robot with a dispensing area of 11.81" x 11.81" (300MM X 300MM). The 300MM Cartesian robot represents a substantial cost saving in comparison to similar desktop robots. Its overall footprint has a depth of less than 26 inches (640MM), suitable for an industrial bench. This line of robots is also available with a low cost vision system.
These bench top industrial robots are ideal for automating a current dispensing application. With the various work areas offered almost every application can be fitted on one of the models in this series; 200, 300 or 400MM Robots.
A program consists of a series of instructions stored in the main unit, each instruction stored in a numbered memory address. An address may record a point location, X, Y, and Z axis value, point type or instruction which sets a certain parameter, such as a dispensing time or line speed.
Installation:
The automatic dispenser machine can satisfy various requirements for dispensing, only need to choose different fixtures and math with dispensing systems.
Adhesive Dispensing Equipment SMT Glue Dispenser Machine,SMTfly-300MTechnical parameters:
X/Y/Z Work Area | 300/300/100 MM |
Work Load | Table/Tool: 10 kg./5 kg |
Max. Speed | X&Y/Z 800/320 (mm/sec) |
Repeat ability | +/- 0.02 mm/axis |
Resolution | 0.001 mm/axis |
Data Memory | 100 Programs/50,000 points per |
Drive System | Micro stepping motor |
Motion Control | Point to point & continuous path |
Teaching Method | Teach Pendant |
I/O Signals | 8 inputs/8 outputs |
External Interface | USB/RS232 |
Power Supply | 100-240 VAC, 320W |
The following installation instruction is based on the 30CC needle cylinder clamp and simple type dispensing system as a model.
1. The standard accessories include the 30CC needle cylinder clamps, and they can be applied to 30CC or 55CC needle cylinder. If you want to use other needle cylinder, then you have to purchase other needle cylinder clamps appropriate.
2. Fix the needle cylinder clamps onto the Z axle. Put the hexagon socket flat head screws through the holes of the clamps and then lock on the Z ground side. The clamp has a couple of holes to select, according to the specific requirements .
3. Connect the signal port(three holes) of the dispenser machine on the backside to the signal port in the controller with dispenser signal line. The signal port in the dispenser machine is the same one that connecting with the foot-plate. Thus a problem may appear that the port can not be shared, if your dispenser machine is not purchased along with the matching machine. In such case, please contact us for joint exchanging.
4. Connect the compressed air source to the dispenser controller, put the needle cylinder collet onto the needle cylinder and tighten it, and put the needle cylinder into the needle cylinder clamps and lock the screws which are used to fix the needle cylinder.( Please don’t over tighten, in case of deformation. And once it deforms, the piston then cannot fit with the inner side of the needle cylinder, and cause air leakage.)
5. Connect the hand held programmer to the machine.
6. Connect the dispenser machine and the controller to 220V power source.
7. Do make sure the pressure pipe of the needle cylinder collect and the power source will not influence the motion of each axles and working plate.
Adhesive Dispensing Equipment SMT Glue Dispenser Machine Application: