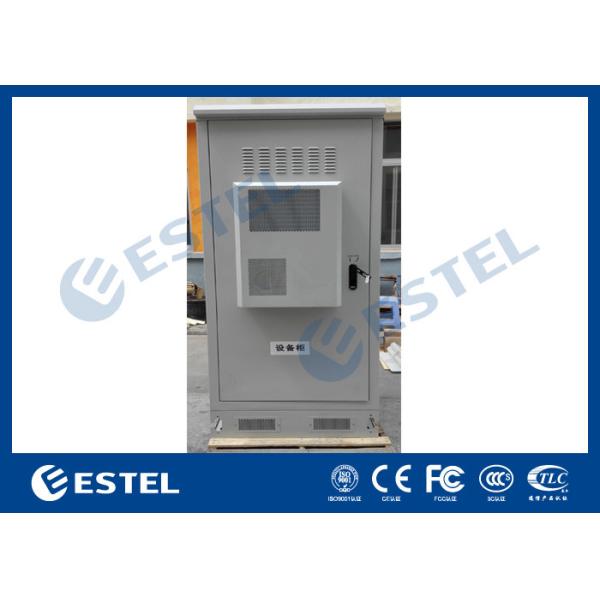
40U 19" Thermostatic Sandwich Outdoor Telecom Cabinet With Emerson Power System, Monitoring Unit
Cabinet configuration list
Cabinet type | Configuration | Quantity | Specifications |
Main cabinet | 19 inch standard rack | 1 | 40U |
Illumination | 1 | 48V DC, LED light | |
Air conditioner | 1 | Input voltage: AC220V 60Hz, cooling capacity: 1500W | |
Emergency fan | 2 | 48VDC, bottom plate air intake | |
Grounding copper bar | 1 | M6 bolts 10 | |
Busbar | 1 | M6 bolts 10 | |
AC and DC power distribution unit | 1 | AC input: 63A/2P*1; AC output: 63A/2P*1; DC input : 63A/1P *1; DC output : 16A/1P*1; DC output : 10A/1P*3; DC output : 6A/1P*3 Circuit breaker brand: Schneider | |
Socket | 1 | 8 -bit universal socket, 220V 16A | |
Embedded power supply | 1 | Model: NetSure211 C46 DC48V, 60A, 3U distribution unit *1 20A rectifier module *3 monitoring module *1 Brand: Emerson | |
Environmental monitoring system | 1 | 1* environment monitoring unit, 1U, SNMP communication; 1* smoke sensor; 1* water sensor; 1* temperature & humidity sensor; 1* tilt & shock combination sensor; 1* door sensor power supply: DC48V | |
Base sealing plate | 1 | 1 set containing 6, before and after one, two right and left |
Appearance
Cabinet material
Sanwich structure panel, galvanized steel, double wall with heat insulation
Cabinet installation
Unpacking
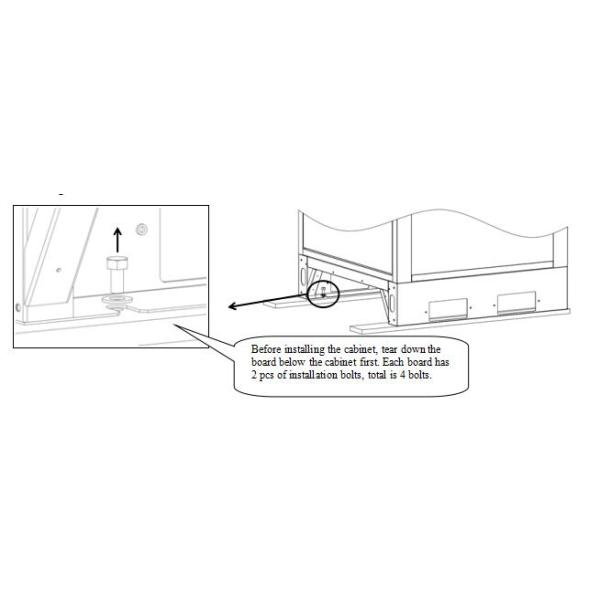
Outdoor integrated cabinets are generally packed in wooden cases. When disassembling the package, take care to avoid damage to the cabinet.
Cabinet base
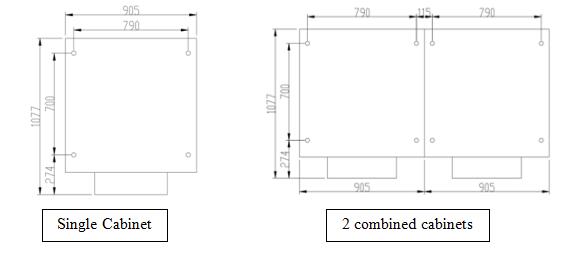
The size of the base of the cabinet and the fixing hole of the base expansion bolt are shown in Figure .
2.3 Cabinet fixing
( 1 ) According to the hole position map or the scribe template of the cabinet base, the base expansion bolt hole of the cabinet is punched with a hammer drill in advance, and the diameter of the hole is referenced to the size of the expansion bolt;
( 2 ) First, fix the leftmost or rightmost first cabinet with expansion bolts, place the remaining cabinets one by one, and finally fix the cabinets with the expansion bolts.
( 3 ) If you need to seal the base of the cabinet, use the base sealing plate (optional) to seal the notch and hole around the base. The mounting screws are the M5 stainless steel screws in the cabinet attachment (see Figure 5 ).
Note: If the cement foundation is not flat, it is recommended to use a gasket or spacer to level the base of the cabinet.
Figure 5
Note: When crossing the wire loop, first cut the cross with a utility knife. After the cable is connected, seal the remaining gap on the wire loop with the sealing glue attached to the cabinet.,As shown below;