* Low MOQ
* Flexible payment methods
* Project Resolution Support
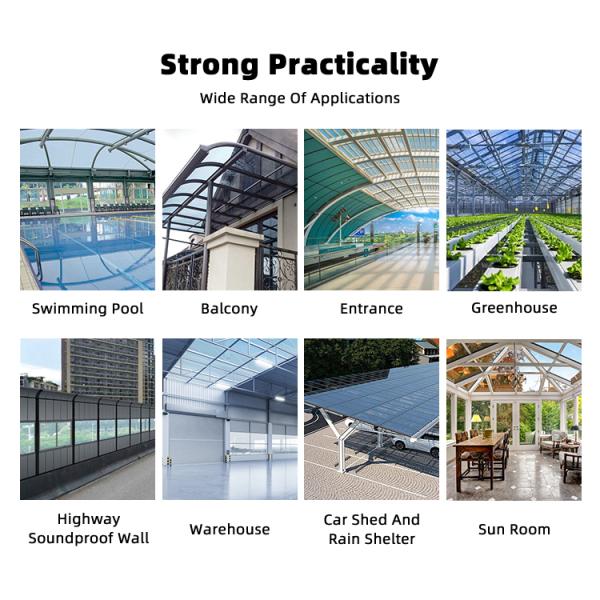
How to ensure waterproof performance when installing polycarbonate sunshade?
To ensure the waterproof performance of polycarbonate sunshades, measures can be taken from pre installation preparation, installation process, and post installation inspection, as follows:
Preparation before installation
Choose appropriate materials: Ensure that the polycarbonate sheet is of good quality, free from defects such as cracks and holes, and has neat and smooth edges. At the same time, reliable waterproof auxiliary materials such as sealants and rubber strips should be selected, which are compatible with polycarbonate materials and have good weather resistance and adhesion.
Check the installation surface: The foundation surface for installing the sunshade, such as walls, roofs, or floors, should be flat, clean, dry, and free of oil stains, dust, and loose debris. For uneven surfaces, polishing or repair treatment is required to ensure a tight fit with the sunshade.
setup script
Reasonable slope setting: According to the design requirements, set an appropriate drainage slope for the sunshade, generally not less than 5%, to ensure that rainwater can flow smoothly to the drainage outlet. If it is a large sunshade or in areas with heavy rainfall, the slope can be appropriately increased to 8% -10%.
Sealing plate connection part: Seal the joint of polycarbonate plate with sealant or rubber strip. Apply sealant evenly on the edge of the board first, and then press the adhesive strip accurately onto the sealant to ensure a tight fit between the adhesive strip and the board without any gaps. For the gaps between the boards, it is necessary to ensure that the sealant is completely filled to avoid leakage or bubbles.
Processing edges and holes: The edges of the sunshade should be sealed, and sealant can be used to wrap the edges to prevent rainwater from seeping through them. For the holes opened during the installation process, such as those used for fixing brackets or installing drainage systems, sealing gaskets or sealants should be used to ensure a tight seal around the holes.
Installation of drainage system: When installing drainage channels and downspouts, ensure that the connections are well sealed. The drainage channel should be installed at the lowest point of the sunshade, and the connection with the sunshade should be sealed with sealant to prevent rainwater from leaking from the connection. The connection between the downspout and the drainage channel should be firm, and the interface should be sealed with sealant to ensure that rainwater can be smoothly discharged to the ground or drainage system.
Check after installation
Overall inspection: After installation, conduct a comprehensive inspection of the sunshade to see if the sealing strip has fallen off, if there are cracks or unfilled sealant, and repair any problems in a timely manner.
Watering test: The waterproof performance is tested through a watering test. Use water spray equipment to spray the sunshade comprehensively, simulate rainfall conditions, and observe whether there is water leakage under and around the sunshade. If any leakage point is found, mark and repair it until there is no leakage.


| Characteristics | Unit | Data | | | | |||
| Thickness | mm | 4 | 6 | 8 | 10 | |||
| Weight | kg/㎡ | 0.9 | 1.3 | 1.5 | 1.7 | |||
| Minimum radius for cold bending arches | mm | 700 | 1050 | 1400 | 1750 | |||
| Standard width | mm | 2100 | 2100 | 2100 | 2100 | |||
| Standard length | mm | No Limited | | | | |||
| Light transmission | | | | | | |||
| Clear | % | 82 | 81 | 80 | 80 | |||
| Grass green | % | 56 | 50 | 44 | 42 | |||
| Lake blue | % | 55 | 49 | 45 | 43 | |||
| Bronze | % | 43 | 36 | 33 | 29 | |||
| White | % | 42 | 35 | 33 | 29 | |||
| Blue | % | 35 | 25 | 20 | 16 | |||
| Heat transfer coefficient K value | W/(㎡.k) | 3.6 | 3.5 | 3.2 | 3.1 | |||
| Weighted sound reduction index | db | 12 | 15 | 15 | 19 | |||
| Drop hammer impact | | Pass | | | | |||
| Coefficient of thermal expansion | mm/m.℃ | 0.065 | | | | |||
| Flame retardant level | | B1 | | | | |||
| Service temperature | ℃ | minus 40~plus 120 | | | | |||


