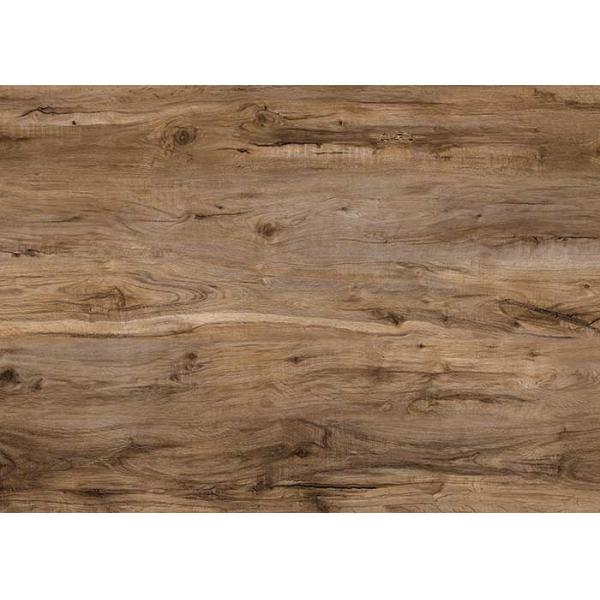
You can choose from solid colours, or from a rangeof patterns including those that mimic other flooring types including natural stone, wood, and tiles. These floors come in an array of realistic looks, available in slate, travertine, wood, and many other trendy design patterns.
Certificate | CE / Floorscore |
Embossing | Deep Embossing |
Warranty | 25 Year |
Color | Wood Texture |
Application | Villa |
Design Style | Modern |
Brand Name | UTOP or Customize |
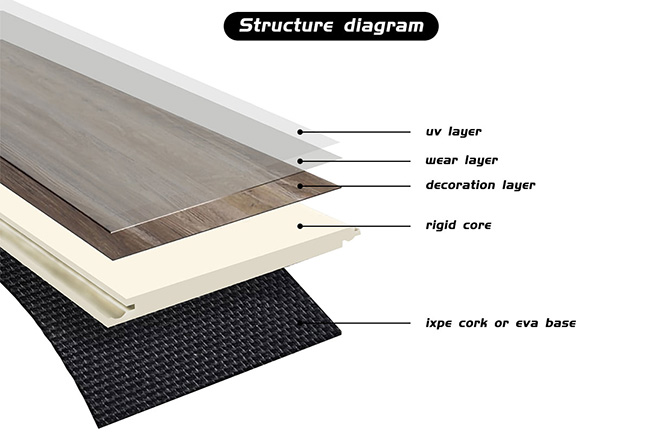
Wear layer | 0.3mm-0.7mm |
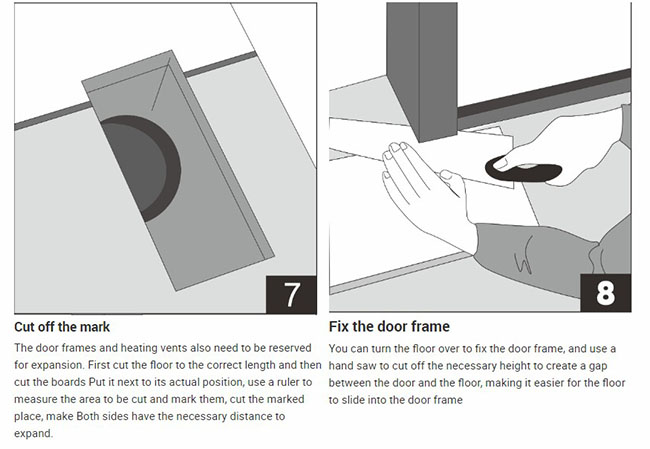
Surface | Ceramic Bead UV Coating |
Thickness | 5.0mm/6.0mm |
Good thermal conductivity
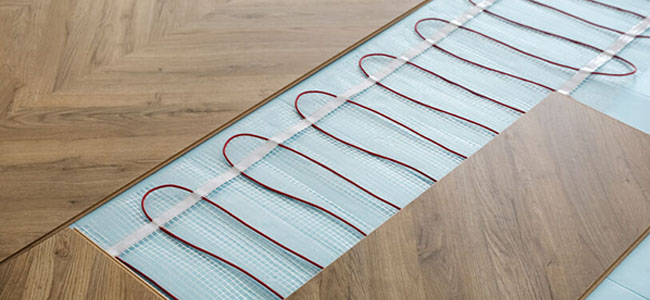
Good thermal conductivity, this feature also determines that the spc floor can actually be used on the ground with floor heating. When there is floor heating at home, many decorators will recommend us to choose tiles as much as possible. But for bedrooms and other rooms, it is not suitable for laying tiles, so it is recommended that you learn about spc flooring. The raw material of the spc floor contains calcium powder, which can conduct heat quickly. Another very important point is that the spc floor will not volatilize and release toxic and harmful gases due to heating.
Ce Certified
All our vinyl flooring products are CE certified. It certifies that our flooring products have met the requirements of Regulation for the Marketing of Construction Products R305/2011 and related standards European harmonized standard EN 14041 in terms of safety, environmental protection, health and consumers protection. All our flooring products are quality assured, you can purchase our products without worries.
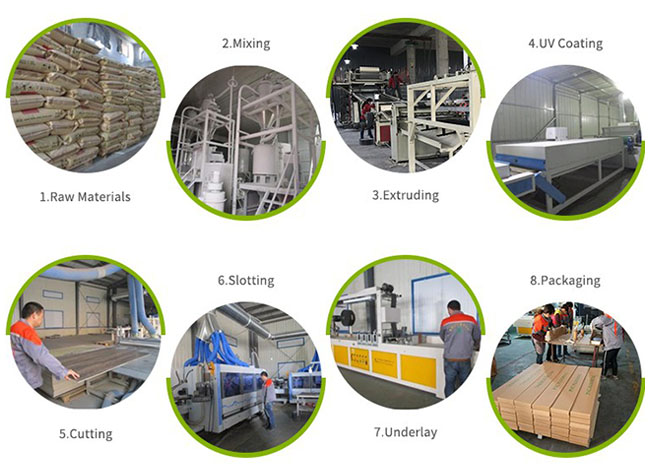
Production Process
Installation steps
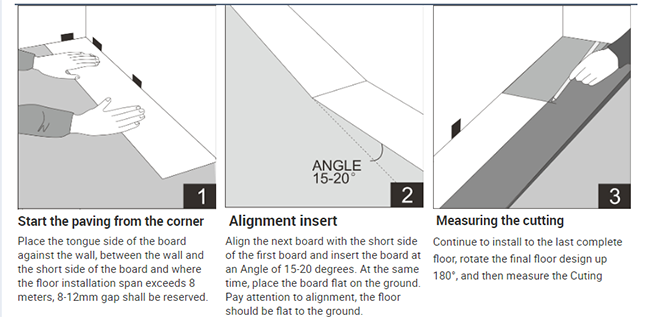
1. Before installation, it is recommended to spread floor film, which can make better feeling of feet and prevent the noise generated between the ground and the floor by small grains of sand. Put the first floor from the left corner of the room.
2. To prevent the natural expansion of the floor, 0.4 cm gap should be reserved between the wall and the floor.
3. When installing the first and second floor, insert the convex damage of the short side into the groove of the first floor,Continue to use the above method to install other floors...
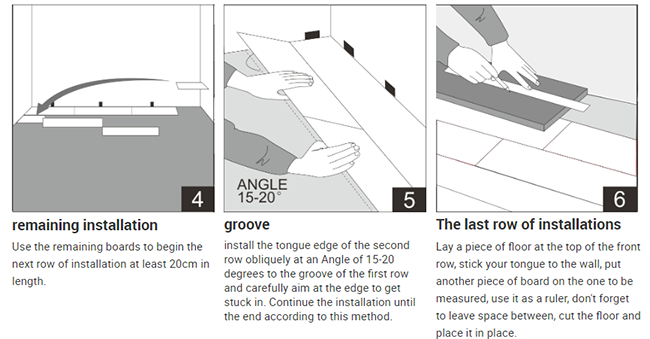
4. When installing the last piece of the first row, you need to take the remaining part of the floor measure-ment first, and note that the floor needs to be measured in reverse.
5. Finally, use the art knife to force the floor surface, break it by hands easily, then install the last floor of the first row.
6. Start installing the second row,When installing the second floor, insert the convex of the short side into the groove of the previous floor, and gently insert the convex of the long side into the corresponding floor groove.
7. Use a rubber hammer when there are gaps.
8. Recommended installation method reference picture.
9. Finally, the same method can be used to install other floors in the room to ensure that necessary expansion gaps are left between all fixed vertical planes in the room, including doors, walls, cabinets and other fixed objects.